uranine-probe
version 1.0
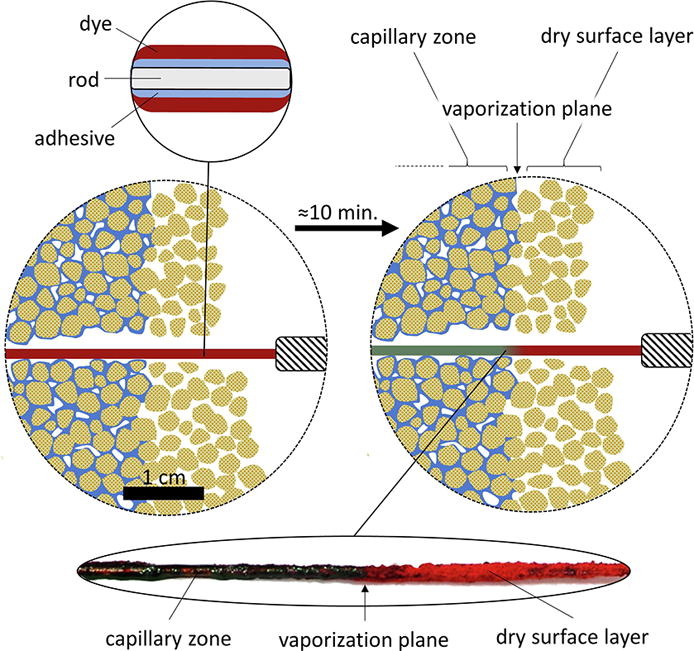
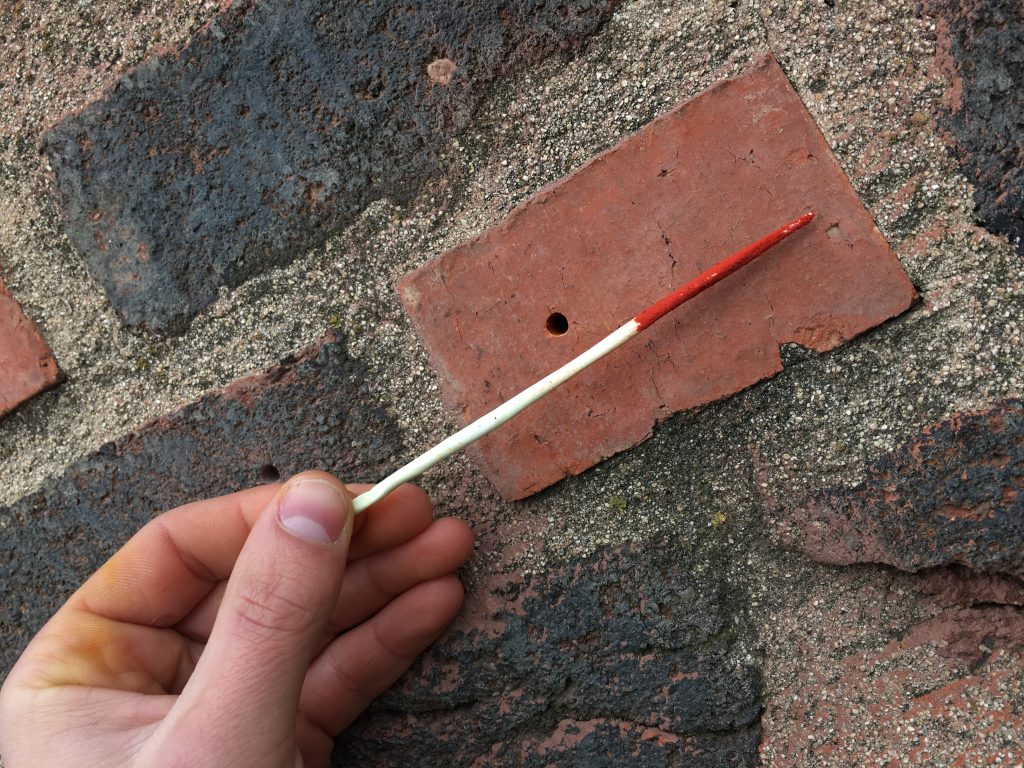
First, a hole in a compact material is drilled using a drill bit and a hand drill. Subsequently, a rod in length exceeding the depth of the drilled hole is coated in an adhesive to create a <0.5 mm thick layer on the entire rod surface. Dye powder is then poured onto a board and the rod with adhesive is pressed against this board repeatedly from all sides to attach the dye powder onto the adhesive. The fines generated by drilling are removed from the hole by pressurized air using a hand pump. Then, this prepared probe is inserted into the hole in a way that ensures contact of the probe with a side of the hole. This is achieved by pressing the probe firmly against the hole side (in case of inclined holes). The probe is left in the hole long enough for the dye to become moist from capillary water. If the relative humidity is <73%, the uranine-probe is left in the hole until the probe reading change but max. 15 min. In this case, the evaporation front is interpreted as the clear green-red boundary. If the relative humidity is >73%, then the same applies, only the evaporation front is interpreted as a boundary between indefinite red-green and green with drops.
Note that the relevant relative humidity is in the hole (that is the relative humidity of air pumped into the hole).

polymerclay-probe
The polymer-clay method consists of a probe made of a porous polymer clay with a diameter of about 2 mm that is inserted into the material of interest, then removed and inserted into a pre-prepared container with Na-fluorescein in powder form and interpreted. At the place of capillary water presence in the material, adhesion and partial dissolution of Na-fluorescein occurs on the probe, at the place corresponding to the dry material, the probe remains in its original form. The location of the evaporation front is then interpreted as the interface between the two parts of the probe. The exact methodology is awaiting peer-review